故事的起源
起源是网上找半天也找不到个能用的插件,我又想做收费功能😂,只能说我空闲时间太多了我就自己研究研究,然后在AI的知道下完成了一部分的对码支付的对接,后期还会完善成为typecho插件来开源使用,我先 暂时提供一下思路和如何简易实现功能
代码实现
本次指导大佬是 chatGPT
找到你服务器上主题的文件夹
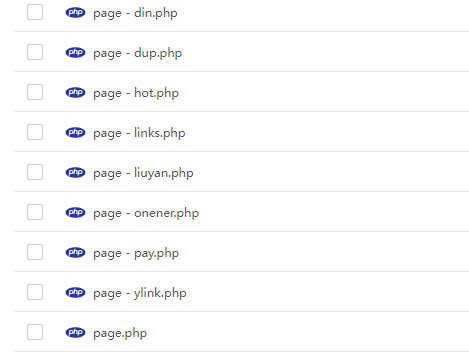
在下面可以看到一些独立模板的文件,page开头的
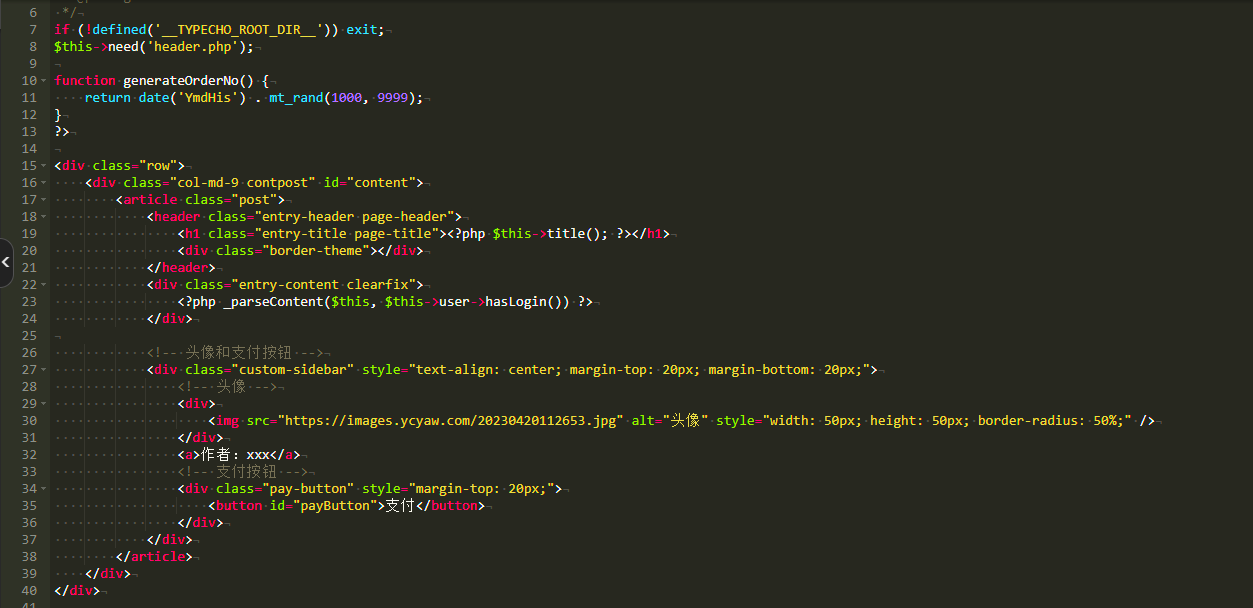
新建一个模板,名称看你们,最好和其他格式一样,我的是page - pay.php,把下面的代码复制进去
<?php/** * 付费页面 * * @package custom */if (!defined(\'__TYPECHO_ROOT_DIR__\')) exit;$this->need(\'header.php\');function generateOrderNo() { return date(\'YmdHis\') . mt_rand(1000, 9999);}?><div class="row"> <div class="col-md-9 contpost" id="content"> <article class="post"> <header class="entry-header page-header"> <h1 class="entry-title page-title"><?php $this->title(); ?></h1> <div class="border-theme"></div> </header> <div class="entry-content clearfix"> <?php _parseContent($this, $this->user->hasLogin()) ?> </div> <!-- 头像和支付按钮 --> <div class="custom-sidebar" style="text-align: center; margin-top: 20px; margin-bottom: 20px;"> <!-- 头像 --> <div> <img src="https://images.ycyaw.com/20230420112653.jpg" alt="头像" style="width: 50px; height: 50px; border-radius: 50%;" /> </div> <a>作者:xxx</a> <!-- 支付按钮 --> <div class="pay-button" style="margin-top: 20px;"> <button id="payButton">支付</button> </div> </div> </article> </div></div><script> document.getElementById(\'payButton\').addEventListener(\'click\', function () { var data = { pid: \'1000\', type: \'wxpay\', out_trade_no: \'<?php echo generateOrderNo(); ?>\', notify_url: \'https://vip.lzzcc.cn/usr/themes/spimes/notify.php\', return_url: \'https://vip.lzzcc.cn/usr/themes/spimes/return.php\', name: \'商品11\', money: \'1\', sitename: \'网站名称\', sign_type: \'MD5\' }; var xhr = new XMLHttpRequest(); xhr.open(\'POST\', \'usr/themes/spimes/generate_sign.php\', true); xhr.setRequestHeader(\'Content-Type\', \'application/x-www-form-urlencoded\'); xhr.onreadystatechange = function () { if (xhr.readyState == 4 && xhr.status == 200) { data.sign = xhr.responseText; var form = document.createElement(\'form\'); form.action = \'码支付接口\'; form.method = \'post\'; for (var key in data) { var input = document.createElement(\'input\'); input.type = \'hidden\'; input.name = key; input.value = data[key]; form.appendChild(input); } document.body.appendChild(form); form.submit(); } }; xhr.send(new URLSearchParams(data).toString()); });</script><?php $this->need(\'footer.php\'); ?>{/collapse-item}
然后在同级目录下创建文件generate_sign.php把下面的代码复制进去
<?php// 你的商户密钥,需要替换为你自己的$merchant_secret = \'11111111\';// 从付费主页面的表单中接收请求参数$data = [ \'pid\' => $_POST[\'pid\'], \'type\' => $_POST[\'type\'], \'out_trade_no\' => $_POST[\'out_trade_no\'], \'notify_url\' => $_POST[\'notify_url\'], \'return_url\' => $_POST[\'return_url\'], \'name\' => $_POST[\'name\'], \'money\' => $_POST[\'money\'], \'sitename\' => $_POST[\'sitename\']];// 按照键名进行升序排序ksort($data);reset($data);// 拼接参数$sign_str = \'\';foreach ($data as $key => $val) { if ($val === \'\') continue; if ($sign_str !== \'\') { $sign_str .= \'&\'; } $sign_str .= "$key=$val";}// 使用商户密钥生成签名$sign_str = md5($sign_str . $merchant_secret);// 返回签名echo $sign_str;{/collapse-item}
然后再创建两个文件notify.php和return.php,复制下面的代码进去
<?php// 你的商户密钥,需要替换为你自己的$merchant_secret = \'111111111\';// 获取请求数据$data = $_POST;// 验证签名ksort($data);reset($data);$sign_str = \'\';foreach ($data as $key => $val) { if ($key == \'sign\' || $val === \'\') continue; if ($sign_str !== \'\') { $sign_str .= \'&\'; } $sign_str .= "$key=$val";}$sign = md5($sign_str . $merchant_secret);if ($sign !== $data[\'sign\']) { // 签名无效,返回错误 echo \'fail\'; exit;}// 签名有效,处理业务逻辑// 更新订单状态、通知用户等// ...// 返回成功echo \'success\';{/collapse-item}
{collapse-item label=\"return.php\"}
<?php// 获取订单 ID$order_id = $_GET[\'order_id\'];// 通过订单 ID 查询订单信息并验证支付状态// ...// 如果支付成功,展示支付成功页面// 否则,展示支付失败页面?><!DOCTYPE html><html lang="en"><head> <meta charset="UTF-8"> <meta name="viewport" content="width=device-width, initial-scale=1.0"> <title>支付结果</title> <script> // 根据实际支付状态设置此变量 var payment_successful = true; // 支付成功为 true,支付失败为 false // 如果支付成功,展示支付成功的内容并在 5 秒后跳转 if (payment_successful) { document.write(\'<h1>支付成功</h1>\'); document.write(\'<p>5 秒后自动跳转到首页...</p>\'); setTimeout(function () { window.location.href = \'支付成功后跳转到哪里去\'; }, 5000); } else { // 支付失败,展示支付失败的内容 document.write(\'<h1>支付失败</h1>\'); document.write(\'<p>请返回重新尝试支付。</p>\'); } </script></head><body></body></html>{/collapse-item}
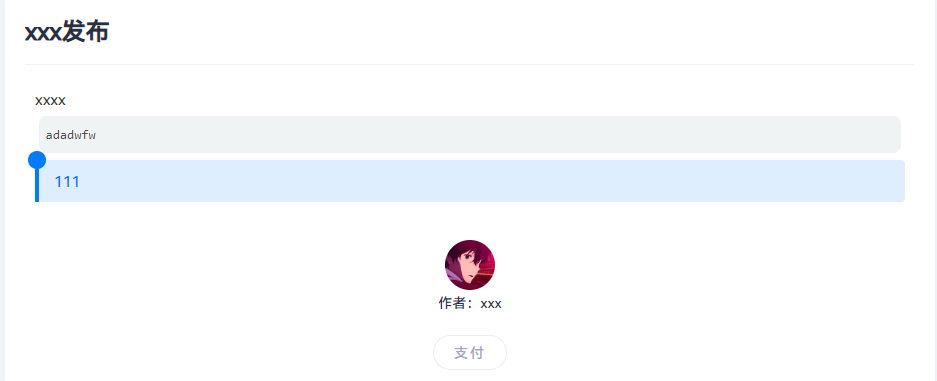
然后去后台新建一个独立页面,模板选择付费模板,里面编辑文章后发布底部就会有支付按钮了以及作者头像
例子: https://vip.lzzcc.cn/288.html
有问题的可以评论区问


暂无评论内容